Composite Coatings

Clip system for composite coatings

Why use this system?

WPC composite cladding is designed for exterior and interior applications, offering a modern, resistant and low-maintenance solution.

The screw fixing system is hidden thanks to the overlap between panels or the use of finishing profiles, guaranteeing a clean and professional aesthetic.

Before Installing

Surface

  1. The wall must be firm, flat, and completely level before installing the substructure.

  2. It is mandatory to install a batten substructure, without directly fixing the panels to the wall.

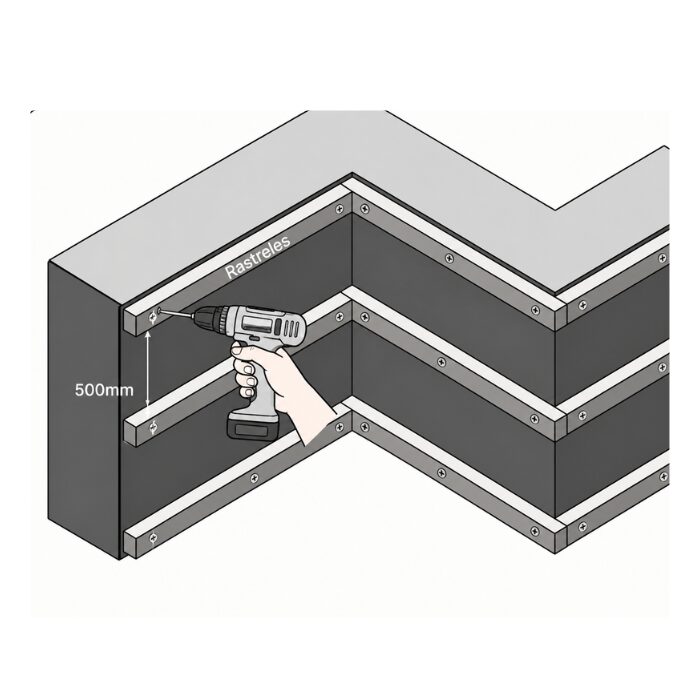
  3. Battens must be placed with a maximum spacing of 500 mm to ensure structural stability.

  4. In horizontal installation, the spacing between screws should be maintained approximately every 400 mm.

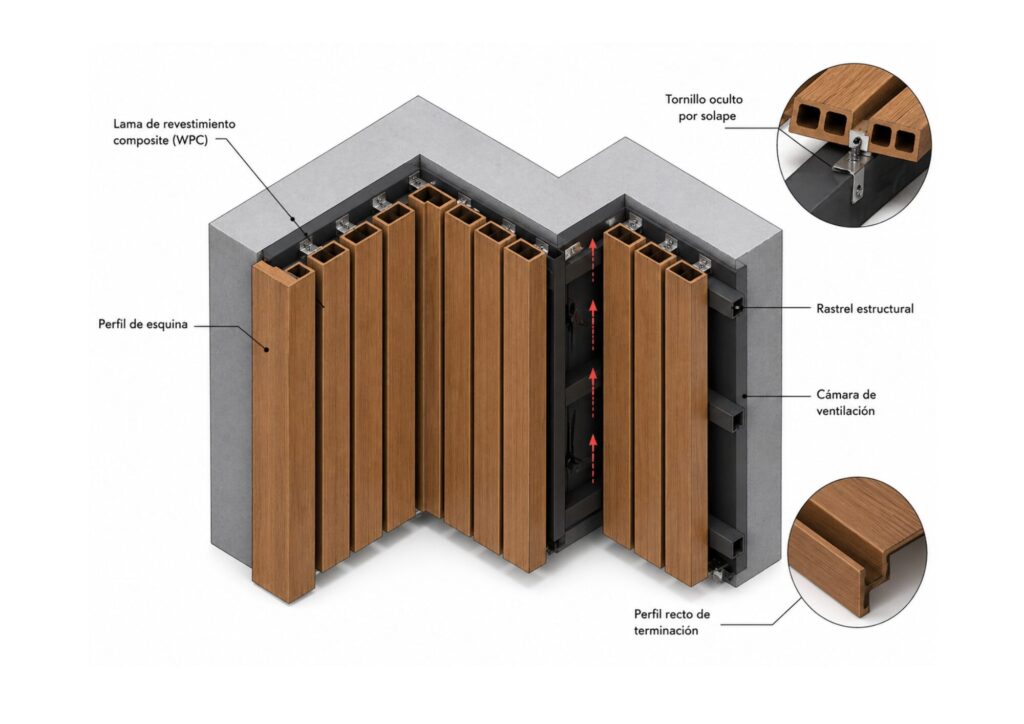
  5. Proper ventilation between the wall and the cladding must be ensured to prevent moisture build-up and improve the durability of the system

Material

  1. The slats must be installed using the screw system hidden through the overlap between panels or by means of termination profiles.

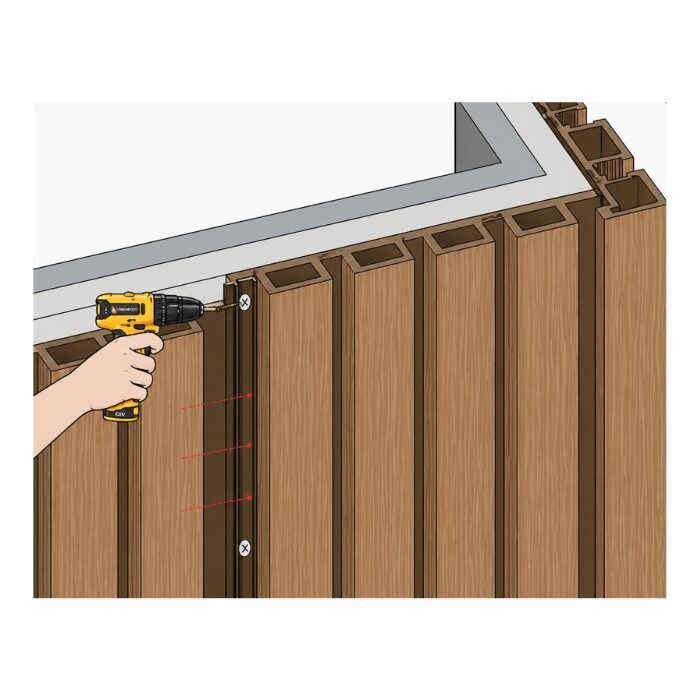
  2. It is recommended to pre-drill before screwing to ensure precise fixation and avoid damage to the composite.

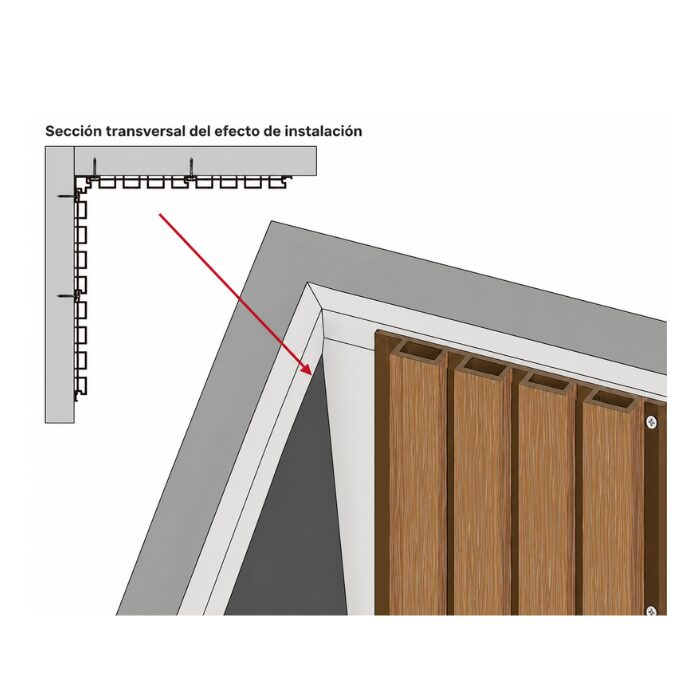
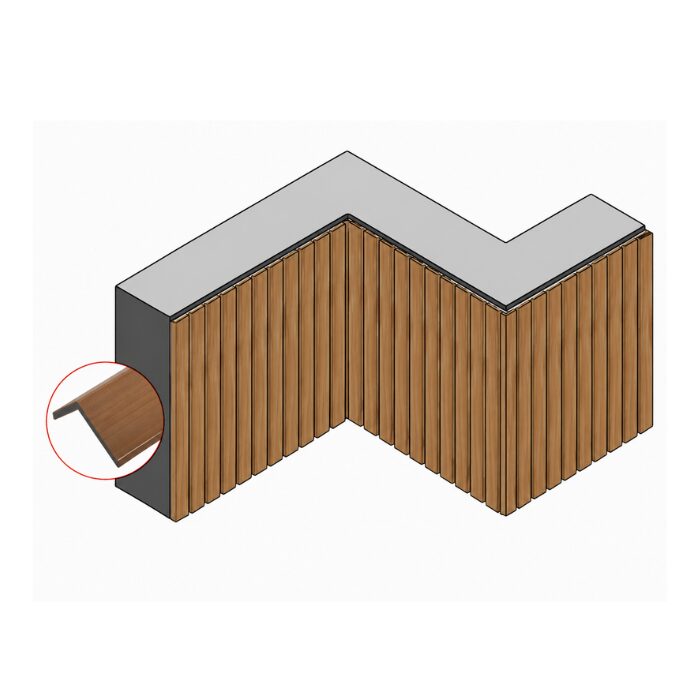
  3. Corner and end profiles must be used to protect the edges and ensure a clean and professional finish.

  4. Panels must be pre-cut and adjusted to actual installation measurements to ensure correct alignment.

Surface map

Secure structural fastening

Secure structural fastening

84

Invisible screws

Low maintenance

Low maintenance

High stability

High dimensional stability

Clean and professional finish

Clean and professional finish

Vertical Installation – Invisible Screw System

STEP 1 COMPOSITE COATING

STEP 1

Install the batten

Ensure a solid base by fixing the battens on a level surface, respecting a separation of 500 mm for a correct structure.

STEP 2

Placement of the initial profile

Install the boot profile at the start of the liner to ensure precise alignment and hide fasteners.

STEP 2 COMPOSITE COATING
STEP 3 COMPOSITE COATING

STEP 3

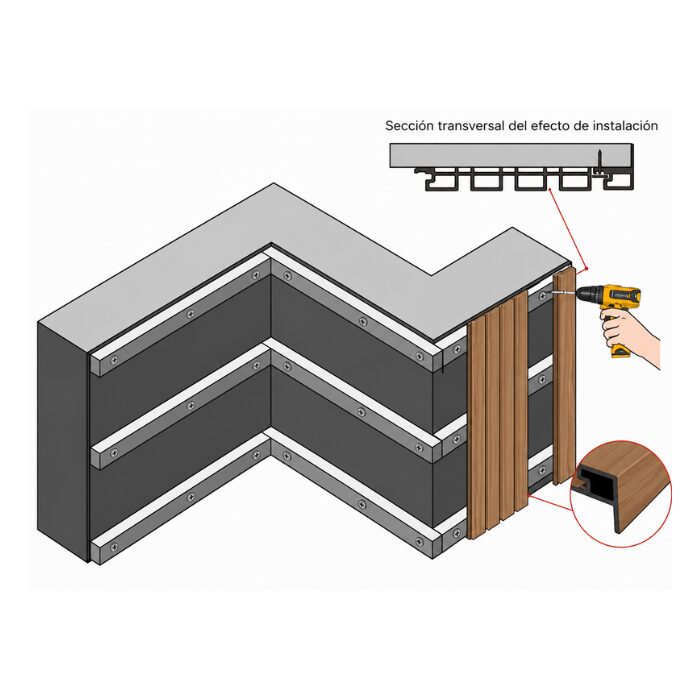
Installing the Corner Profile

It fixes the profile in corners for a clean finish, allowing the perfect meeting between panels and hiding the screws.

STEP 4

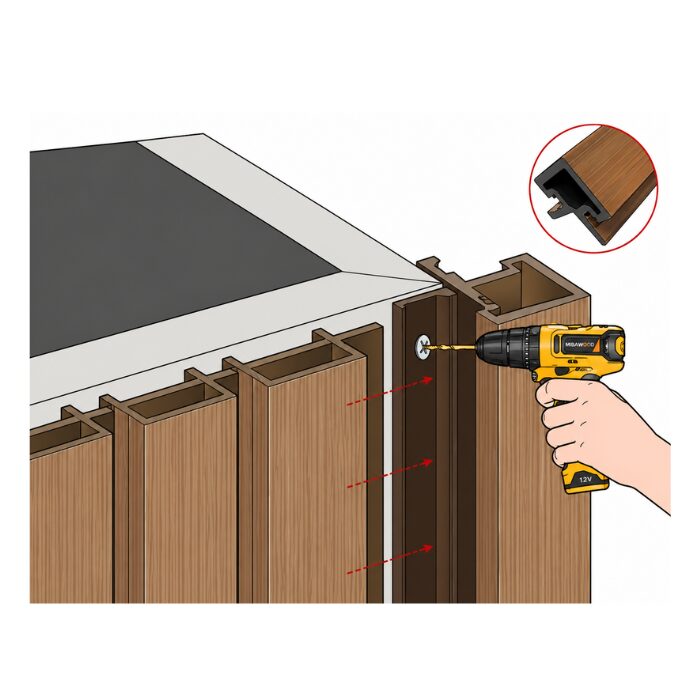
Panel assembly

Position the panels continuously, fixing and overlapping them to achieve an invisible and uniform installation.

STEP 4 COMPOSITE COATING
STEP 15COMPOSITE COATING

STEP 5

System continuity

The installation continues maintaining the overlap between panels, ensuring stability and total concealment of the screws.

STEP 6

Final Punch

It completes the system with finishing profiles, ensuring an aesthetic, protected and durable closure of the cladding.

STEP 6 COMPOSITE COATING

Technical documentation