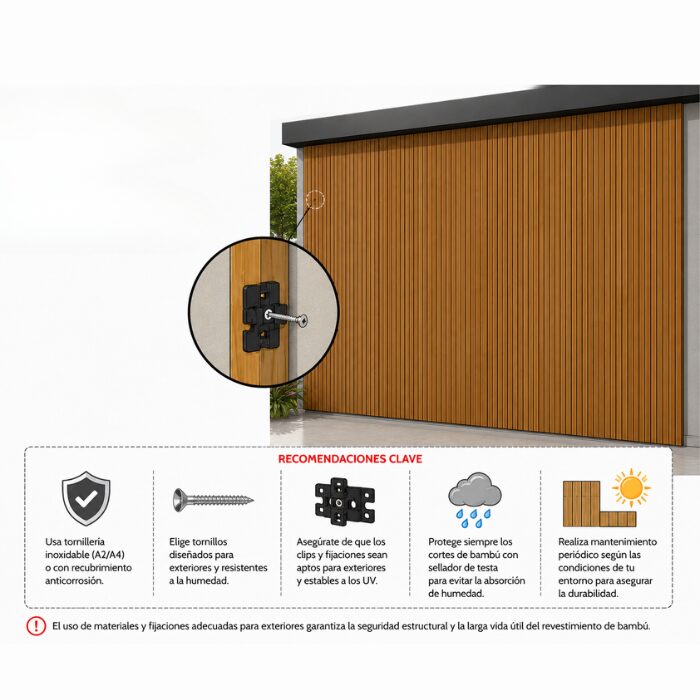
The bamboo cladding clip system is designed for ventilated facades, enclosures and protected exterior walls, in both residential and commercial projects.
Ideal Applications:
Contemporary façades
Single-family homes
Premium hotels and spaces
Ventilated exterior enclosures
Sustainable architectural projects
Before Installing
Surface
The wall must be firm, with no loose parts, and reasonably flat before installing the substructure.
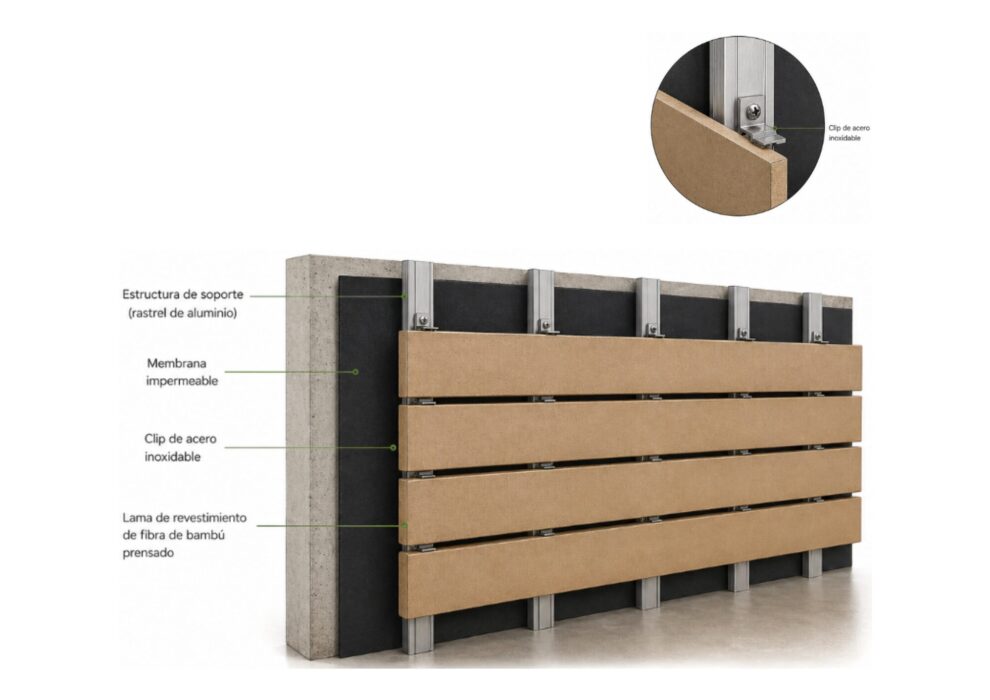
It is mandatory to install it on a ventilated substructure (aluminium battens or treated wood), creating a minimum air chamber of 20–30 mm.
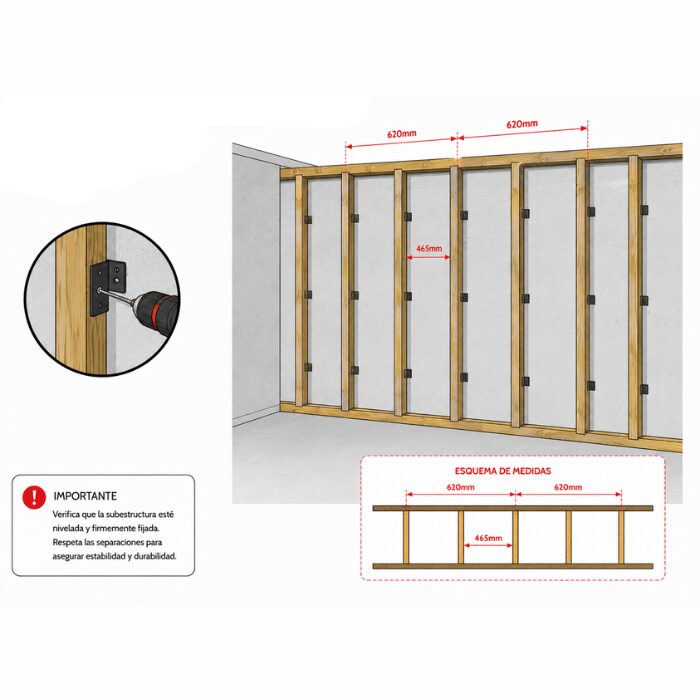
The spacing between battens must respect the indicated joist spacing: 620 mm.
The battens must be perfectly coplanar to avoid deformations or irregularities in the panels.
A minimum separation of 50 mm from the finished floor should be left to avoid contact with moisture.
It is essential to ensure proper ventilation after the coating to allow moisture evacuation and improve the durability of the system.
Material
Bamboo cladding slats should be installed exclusively using the concealed fixing clip system, avoiding direct perforations on the visible side of the material.
Pre-drilling is mandatory during installation to avoid cracking or delamination caused by the screw tip.
A slat spacing of 3–5 mm should be maintained to allow for proper natural expansion and contraction of the bamboo.
The panels must be cut and adjusted beforehand according to the actual measurements of the installation to ensure alignment and correct integration in corners and joints.
Surface map
What does the system include?
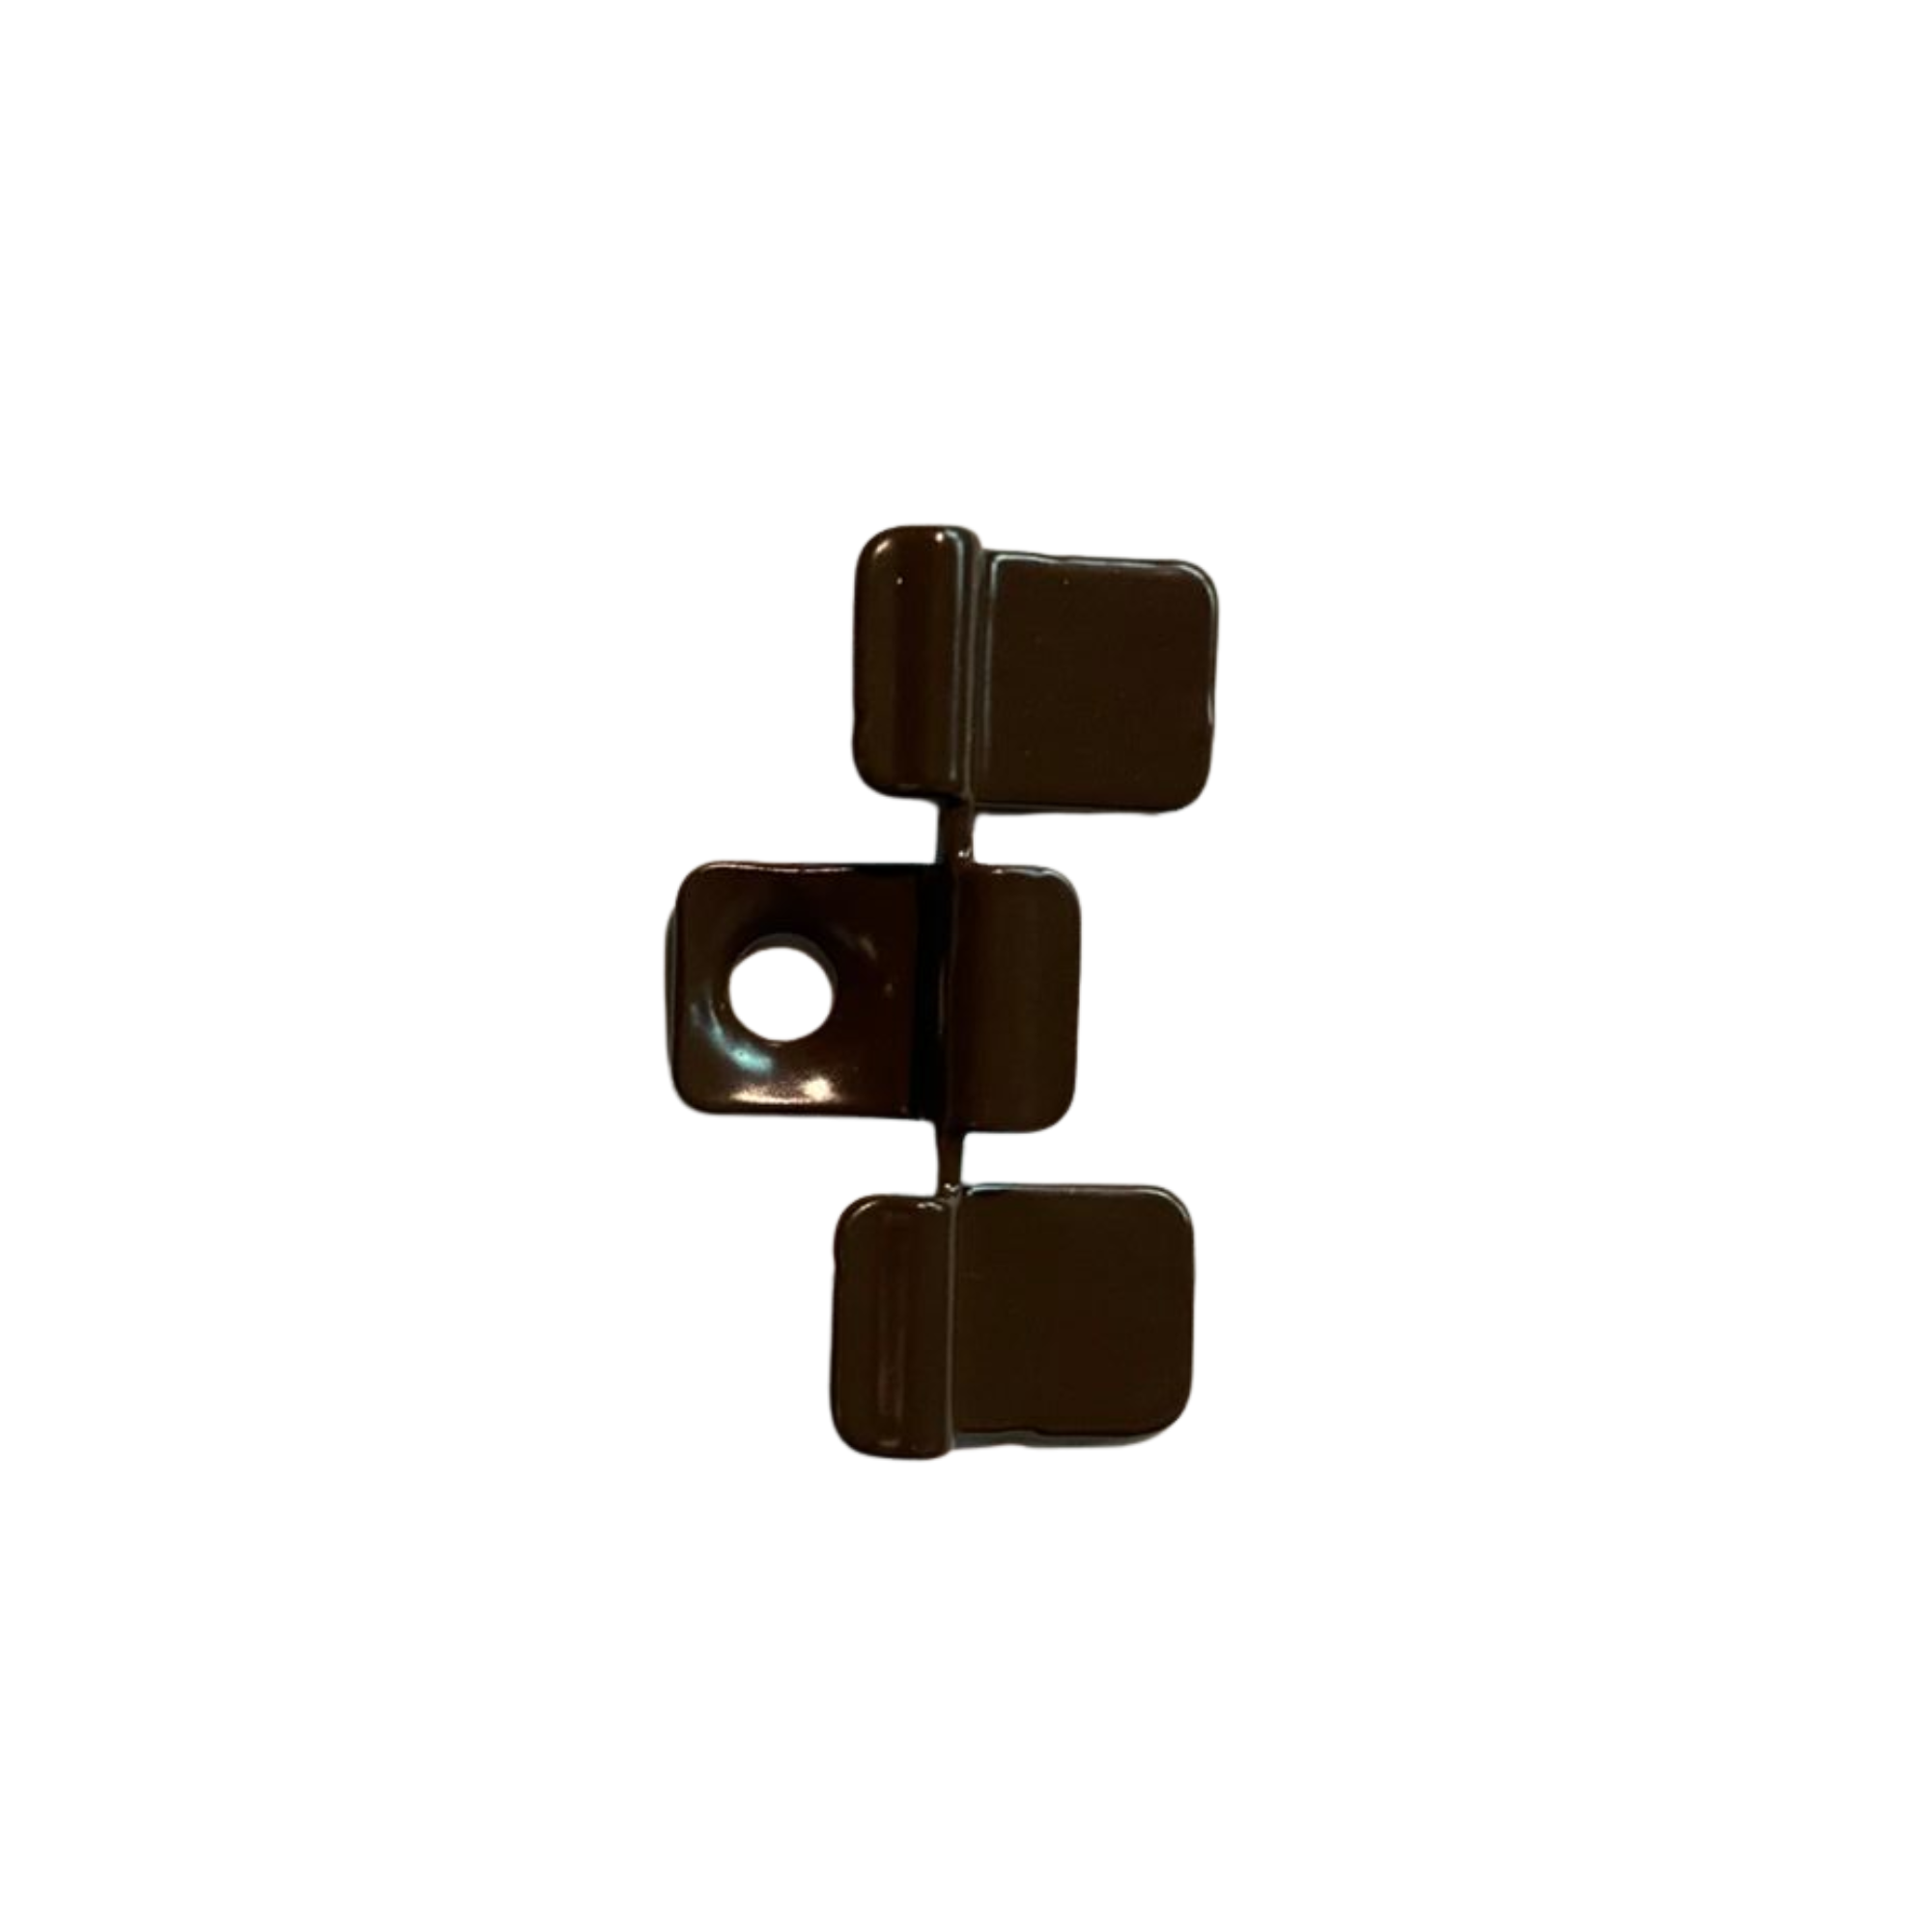
Concealed attachment clips
Attach the slat to the batten without piercing the visible surface.
Stainless steel screws
Resistant to external corrosion
Invisible fixation
Controlled natural movement
High dimensional stability
Increased exterior durability
Clean, modern aesthetics
Steps to perform installation
STEP 1
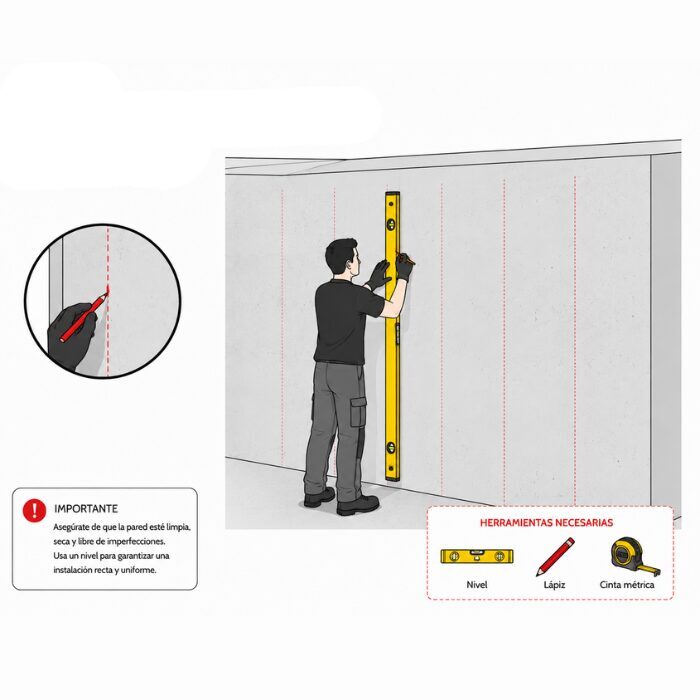
Preparing the Bracket (Wall)
Check that the wall is level and mark the installation guides.
STEP 2
Assembly of the substructure (joist)
Install the battens aligned with adequate 465mm spacing and beams at 620mm
STEP 3
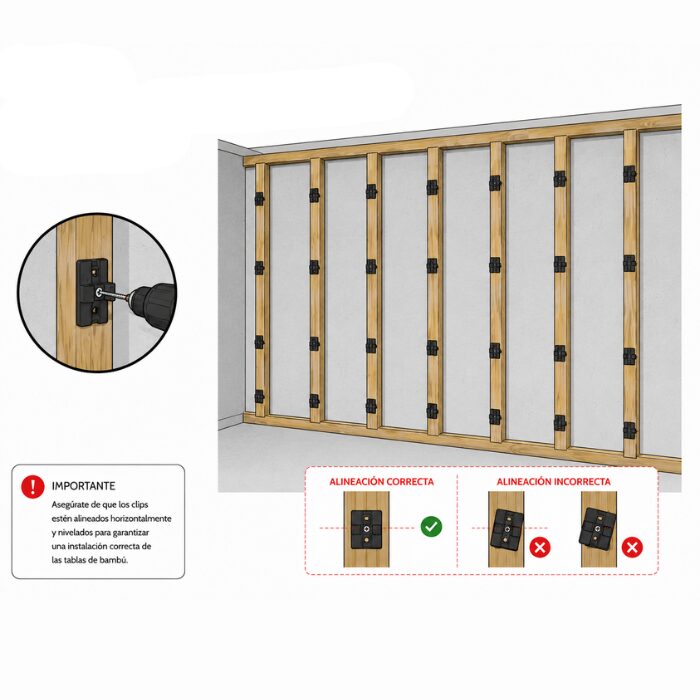
Placing the clips on the battens
Fix the clips on each batten correctly aligned.
STEP 4
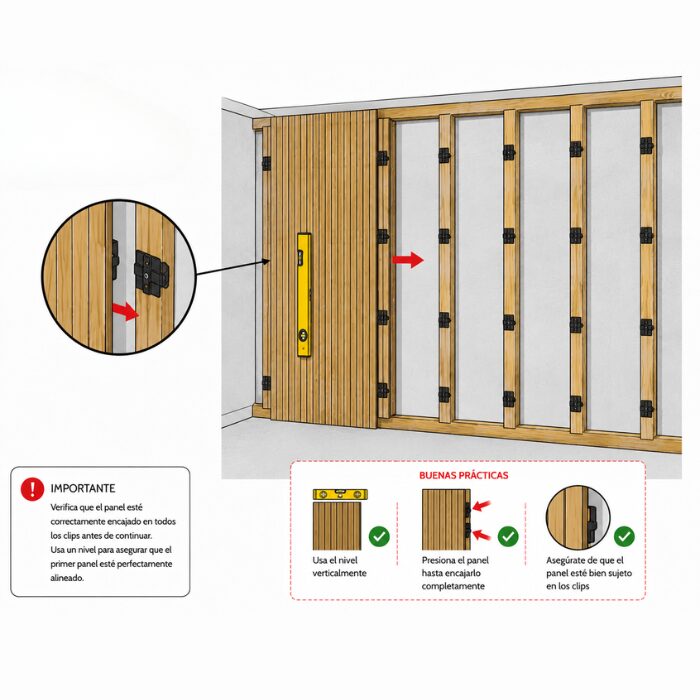
First panel
Place and fit the first panel ensuring leveling.
STEP 5
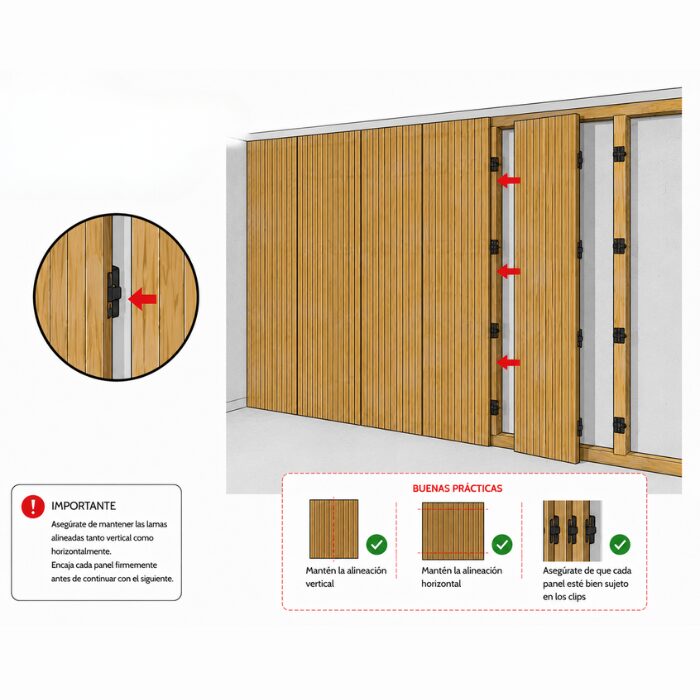
Panel Installation
Fit the slats successively maintaining alignment.
STEP 6
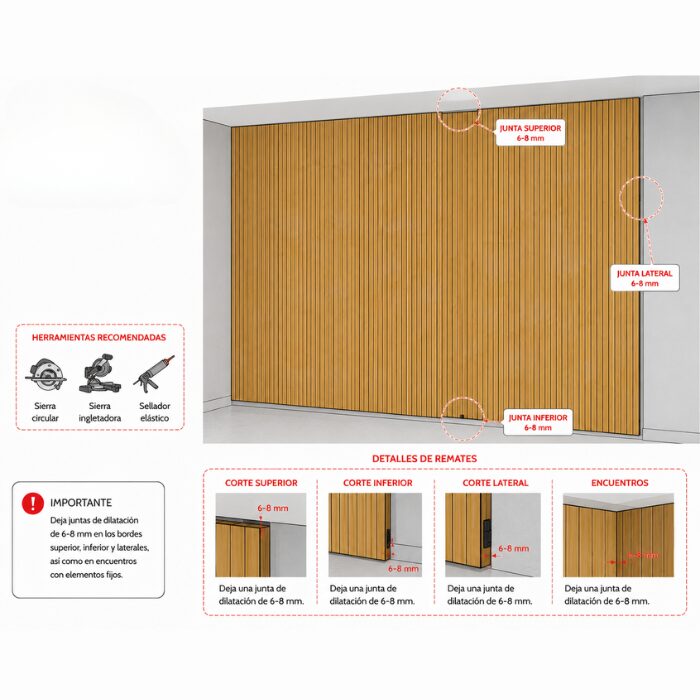
Final Finishes
It makes cuts and finishes leaving expansion joints.
EXTRA
Recommendations
Use screws and fixings suitable for outdoor use (stainless steel/anti-corrosion)